When you start with a custom field on a purchase order, that information will transfer over to the bill as well making it easier to track custom orders for specific clients.
While creating a new vendor, if you think of a new custom field you would like to start tracking, you can easily add the field by clicking the hyperlink “+Add custom field.”
Step 3: Select which forms and the visibility of custom fields
Initially QuickBooks Online Advanced was limited to only 10 custom fields, fortunately recent upgrades to this popular feature now provides users 12 custom fields per transaction type:
Sales:
- Sales Receipts
- Estimates
- Invoices
- Credit Memo
- Refund Receipts
Purchases:
- Purchase Orders
- Expenses
- Bill
- Check
- Vendor Credit
- Credit Card Credit
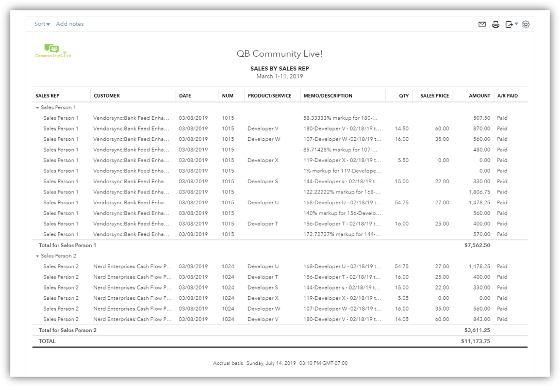
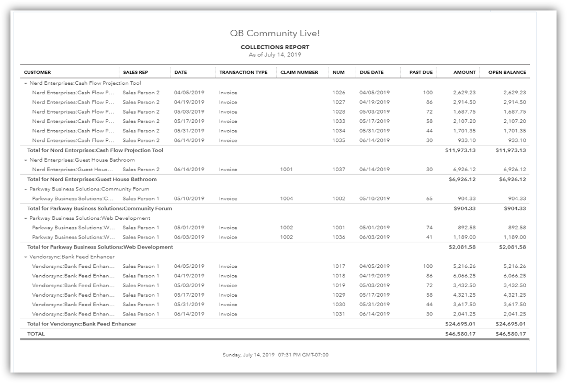
Show on Forms: Currently, only three fields can be printed on any document that allows the fields to be displayed. Any more than three will only be visible through QuickBooks Online and on specific reports that have been customized to display the information. The transaction types that you can print the custom fields on are:
- Sales Receipts
- Estimates
- Invoices
- Credit Memo
- Refund Receipts
- Purchase Orders
Once you have selected three custom fields for any given transaction type, the toggle switch to turn on printing will be grayed out. After setting the custom field to print, you will notice a printer icon on the main custom field dashboard next to the transaction type printing was selected.
Step 4: Displaying custom fields in your workflow
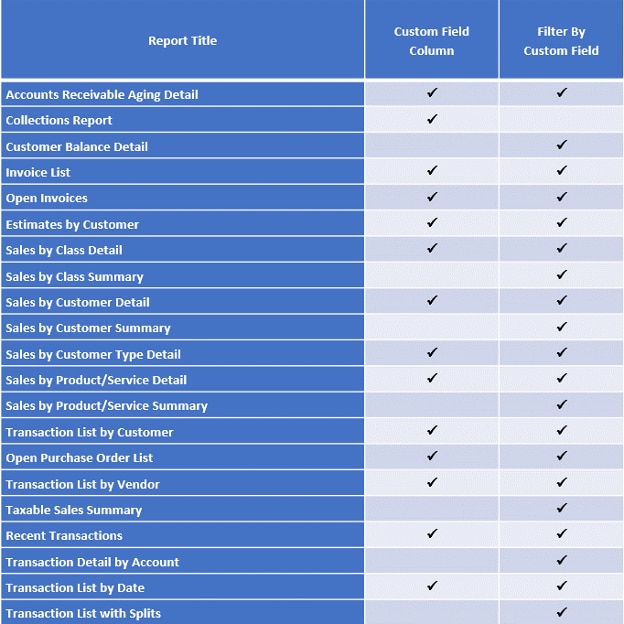
Previously, we discussed the difference between customer-based, transaction-based, and vendor-based fields. An additional benefit of the customer-based fields is the ability to display values directly within the customer screen, as well as the ability to filter by the values in custom reporting.


