Looking for comprehensive job costing in QuickBooks® Online? Look no further than the Projects feature! Your clients can manage all of their jobs and projects using the Projects’ all-in-one dashboard. Not only will they be able to see all their jobs in one place; they can also view the profitability of each project they are working on. Review this step-by-step guidance to advise your clients.
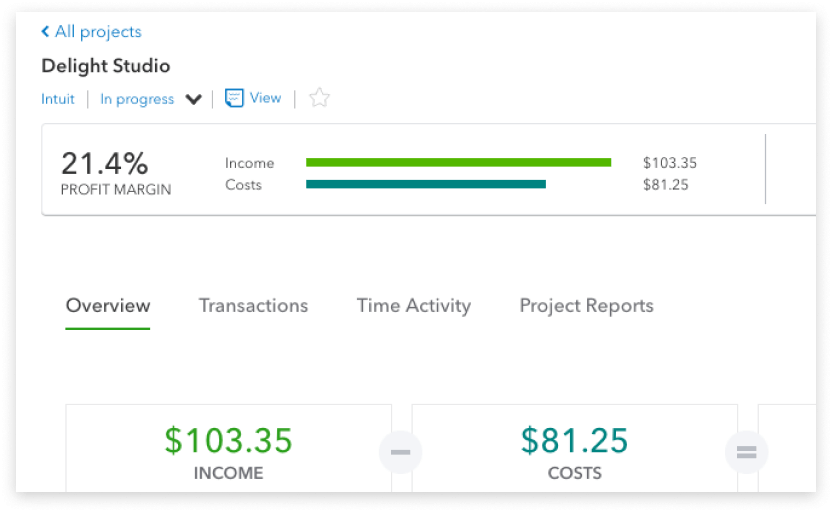
QuickBooks can do WHAT? Project profitability
What can it do?
Projects works along with the time tracking, payroll, and billable expenses features in QuickBooks Online to give you an accurate look at the profitability of each job, including income, expenses, profit margin, and time worked
Where do I find it?
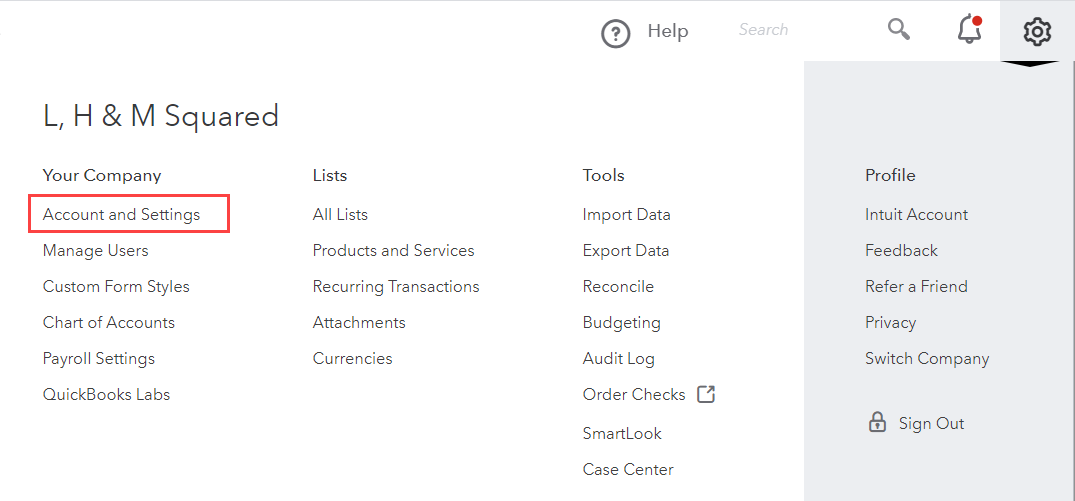
Turn on the Project feature by logging into your QuickBooks Online Plus or QuickBooks Online Advanced account and clicking on the Gear icon in the top navigation bar. Open Account and Settings and select the Advanced tab on the left.
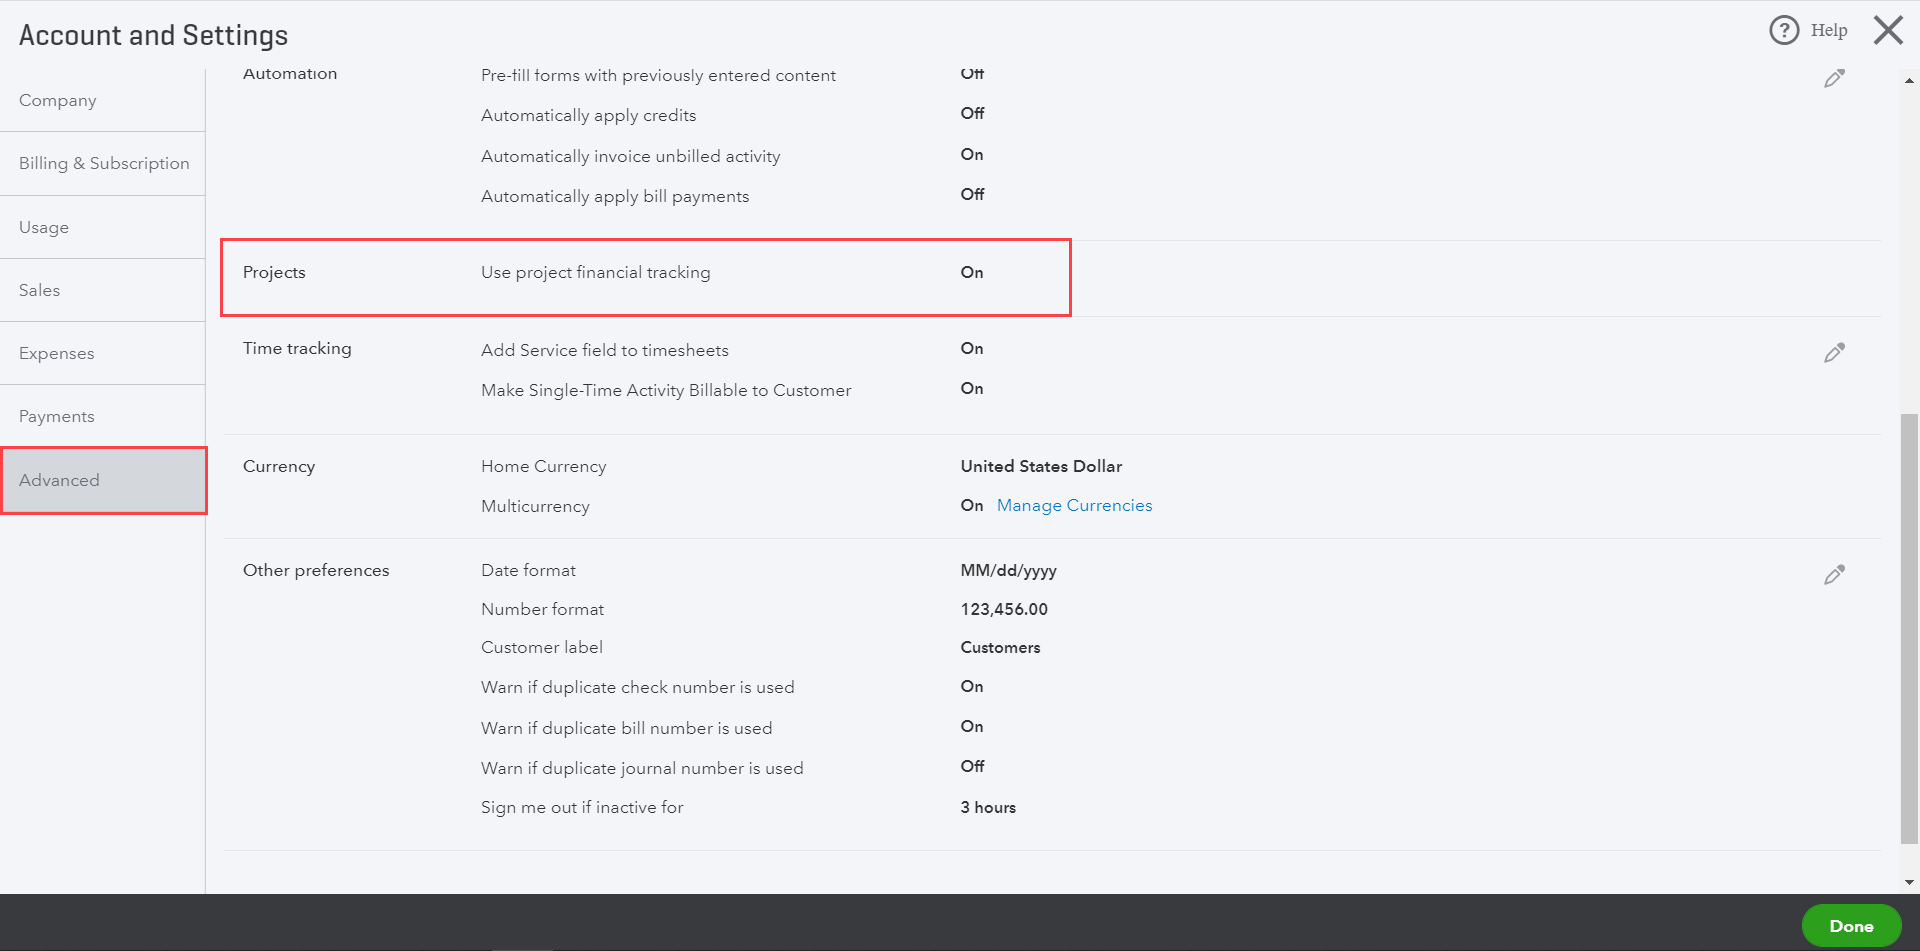
There will be a pencil icon next to Projects — check the box and click Save to enable projects.
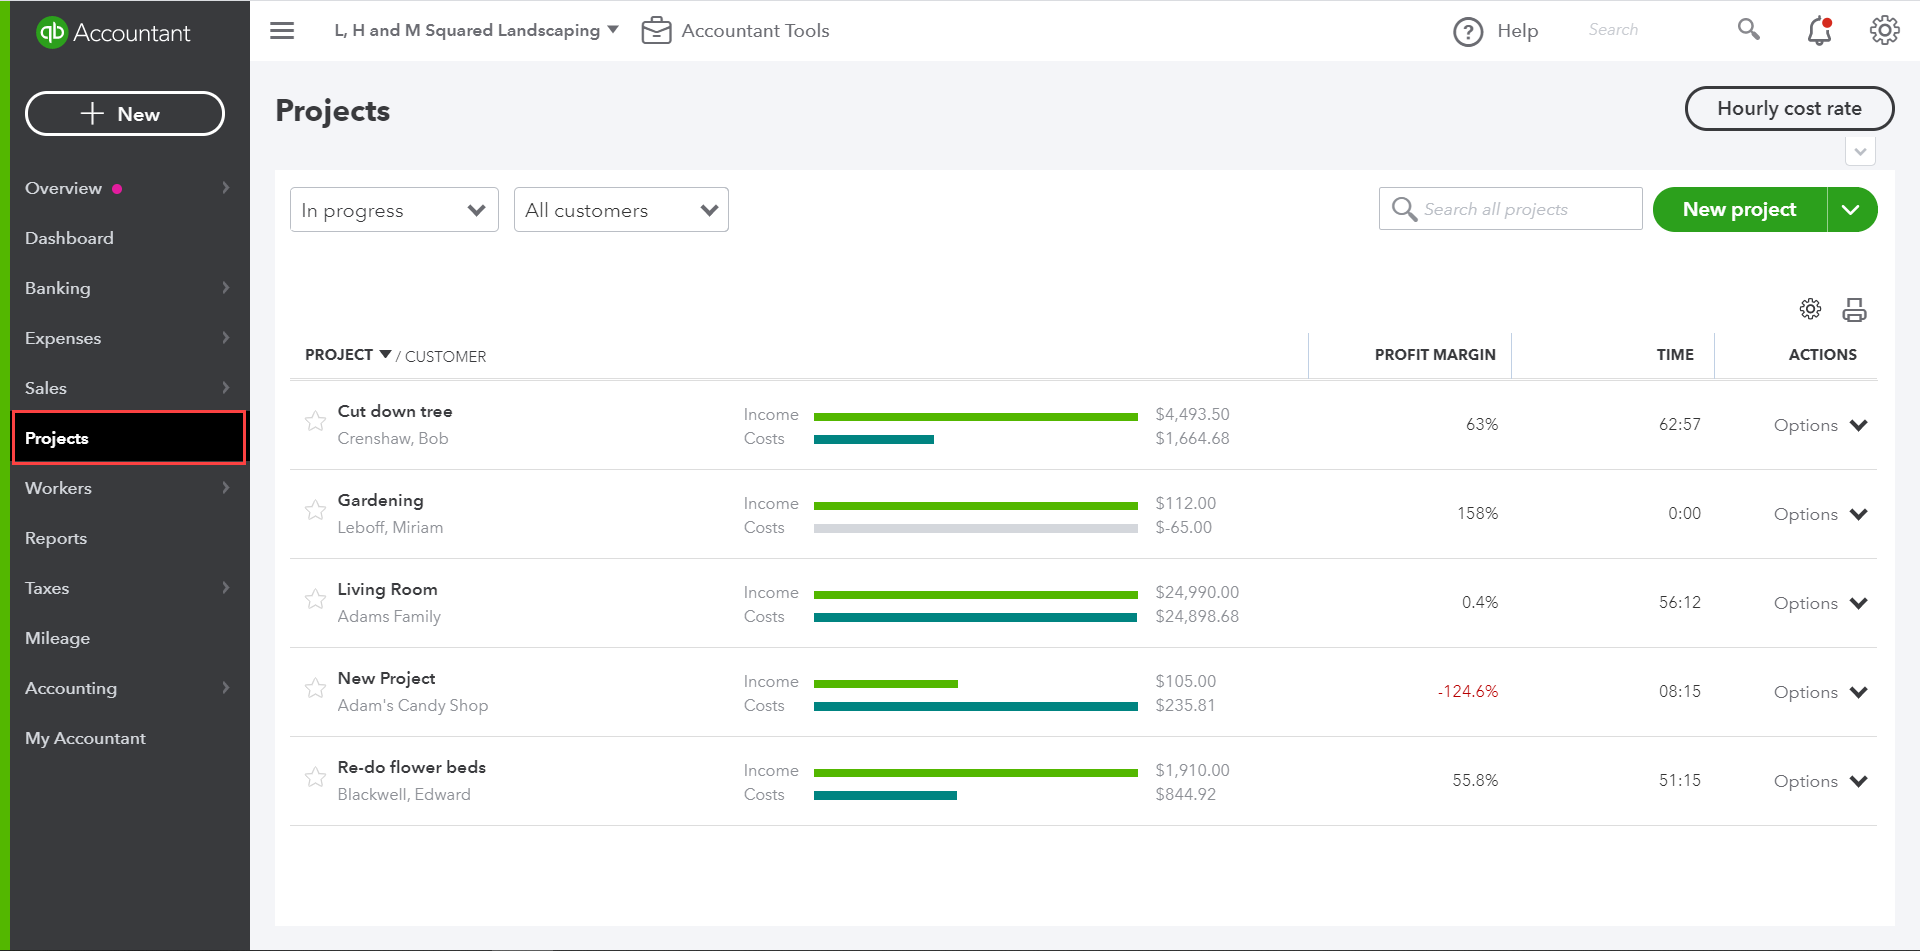
Once you return to your dashboard, you’ll see the Projects tab in the left navigation bar.
How do I use it?
Create projects and start tracking all your transactions to specific projects for better insight into profitability, allowing you to see which projects move your bottom line.
Step 1: Create a new project
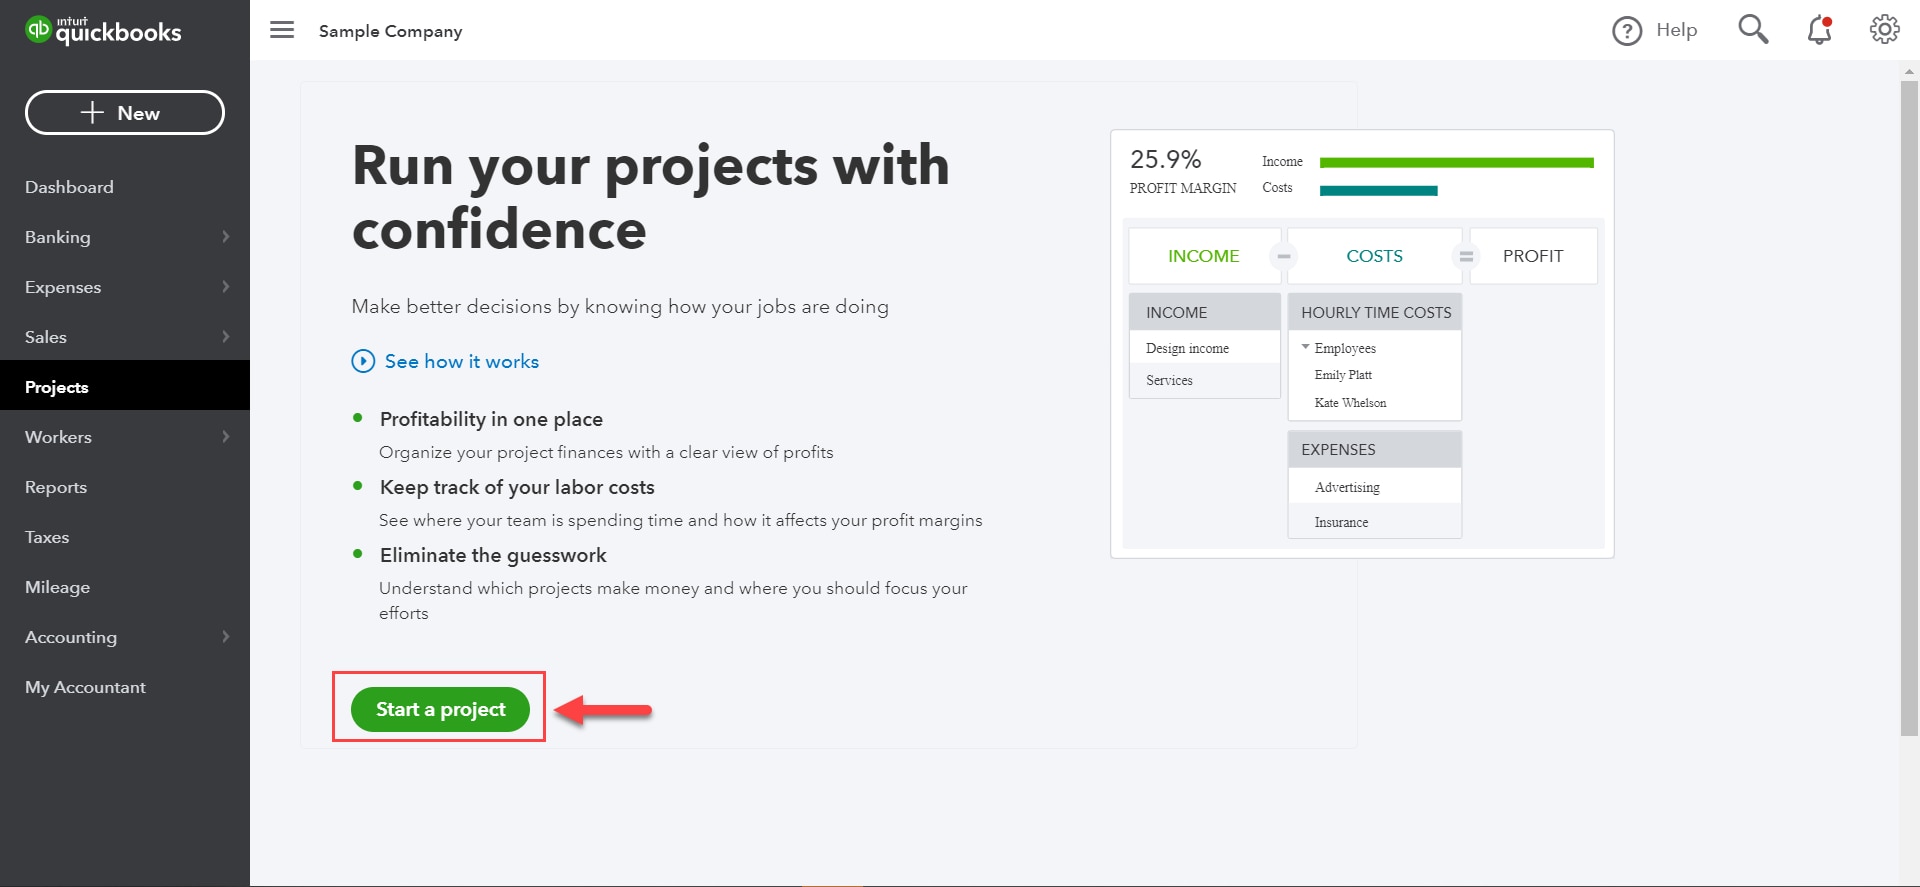
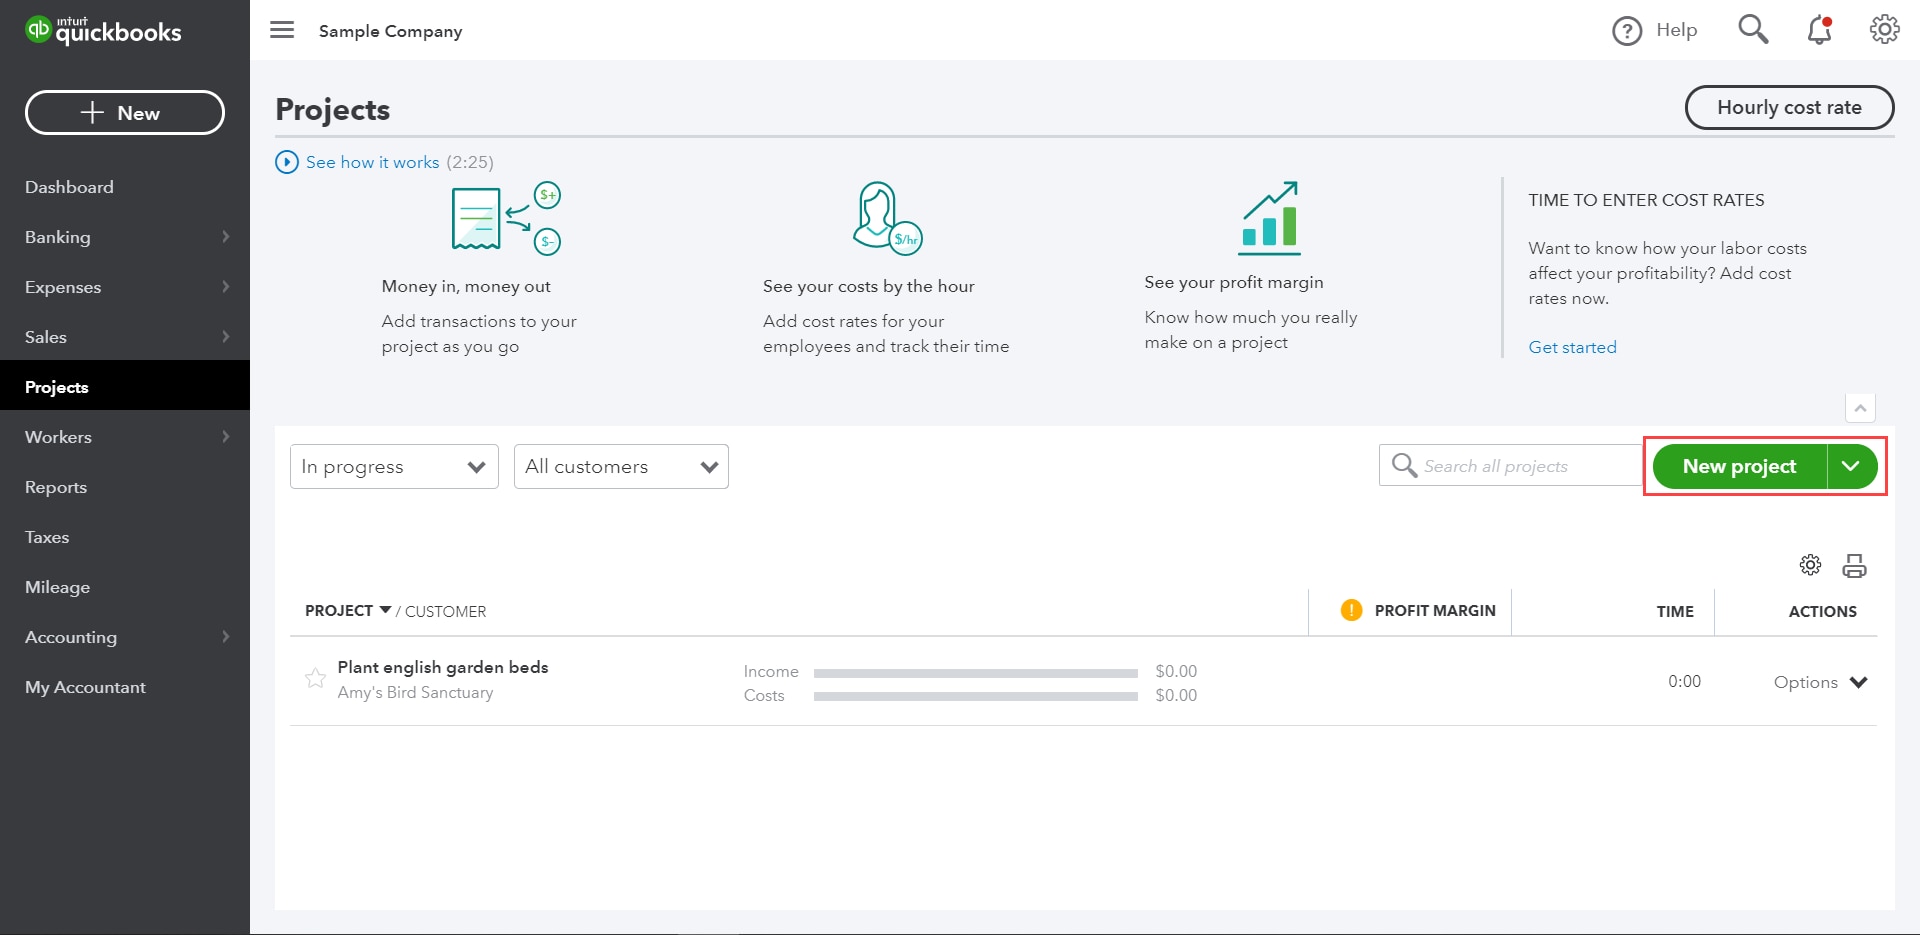
Create your first project by going into Projects from the left navigator bar and clicking the Start a project or New project button.
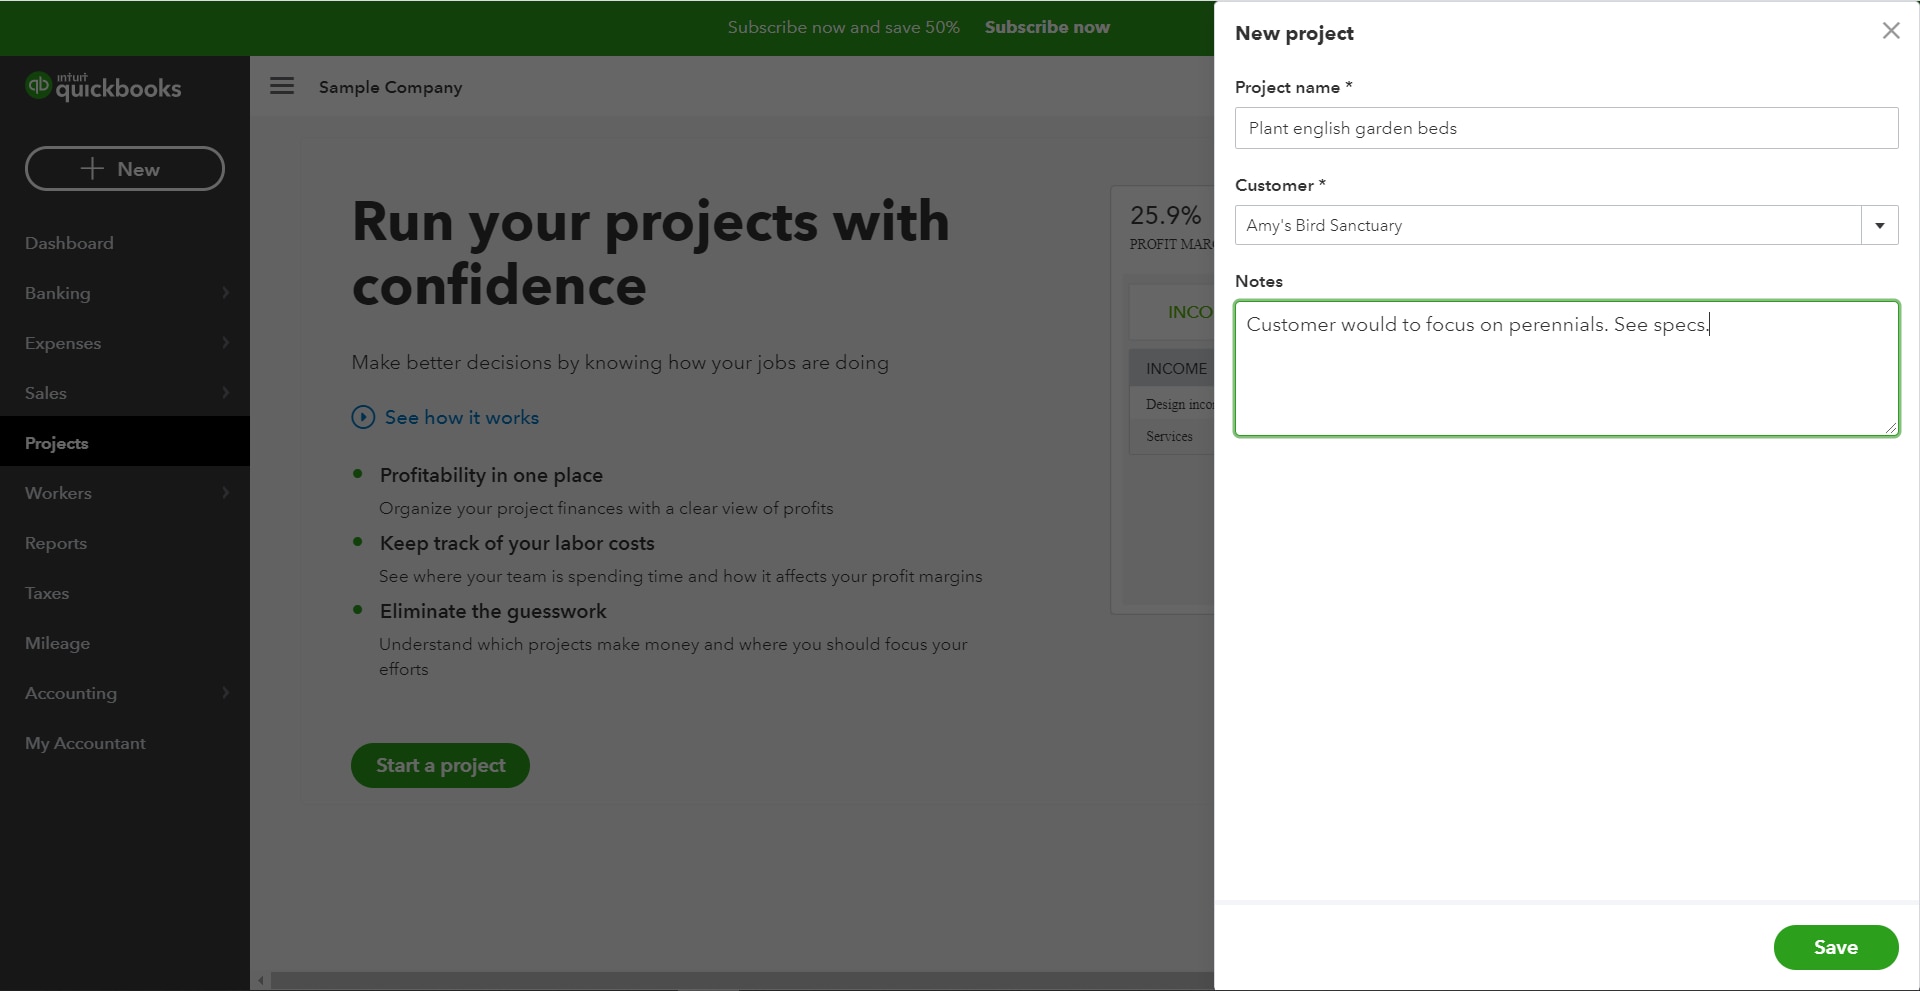
Give your project a descriptive name and assign it to a customer. You can also include notes that might give important information to you or other members of your team who use QuickBooks. Click Save along the bottom.

Give your project a descriptive name and assign it to a customer. You can also include notes that might give important information to you or other members of your team who use QuickBooks. Click Save along the bottom.
Step 2: Record transactions
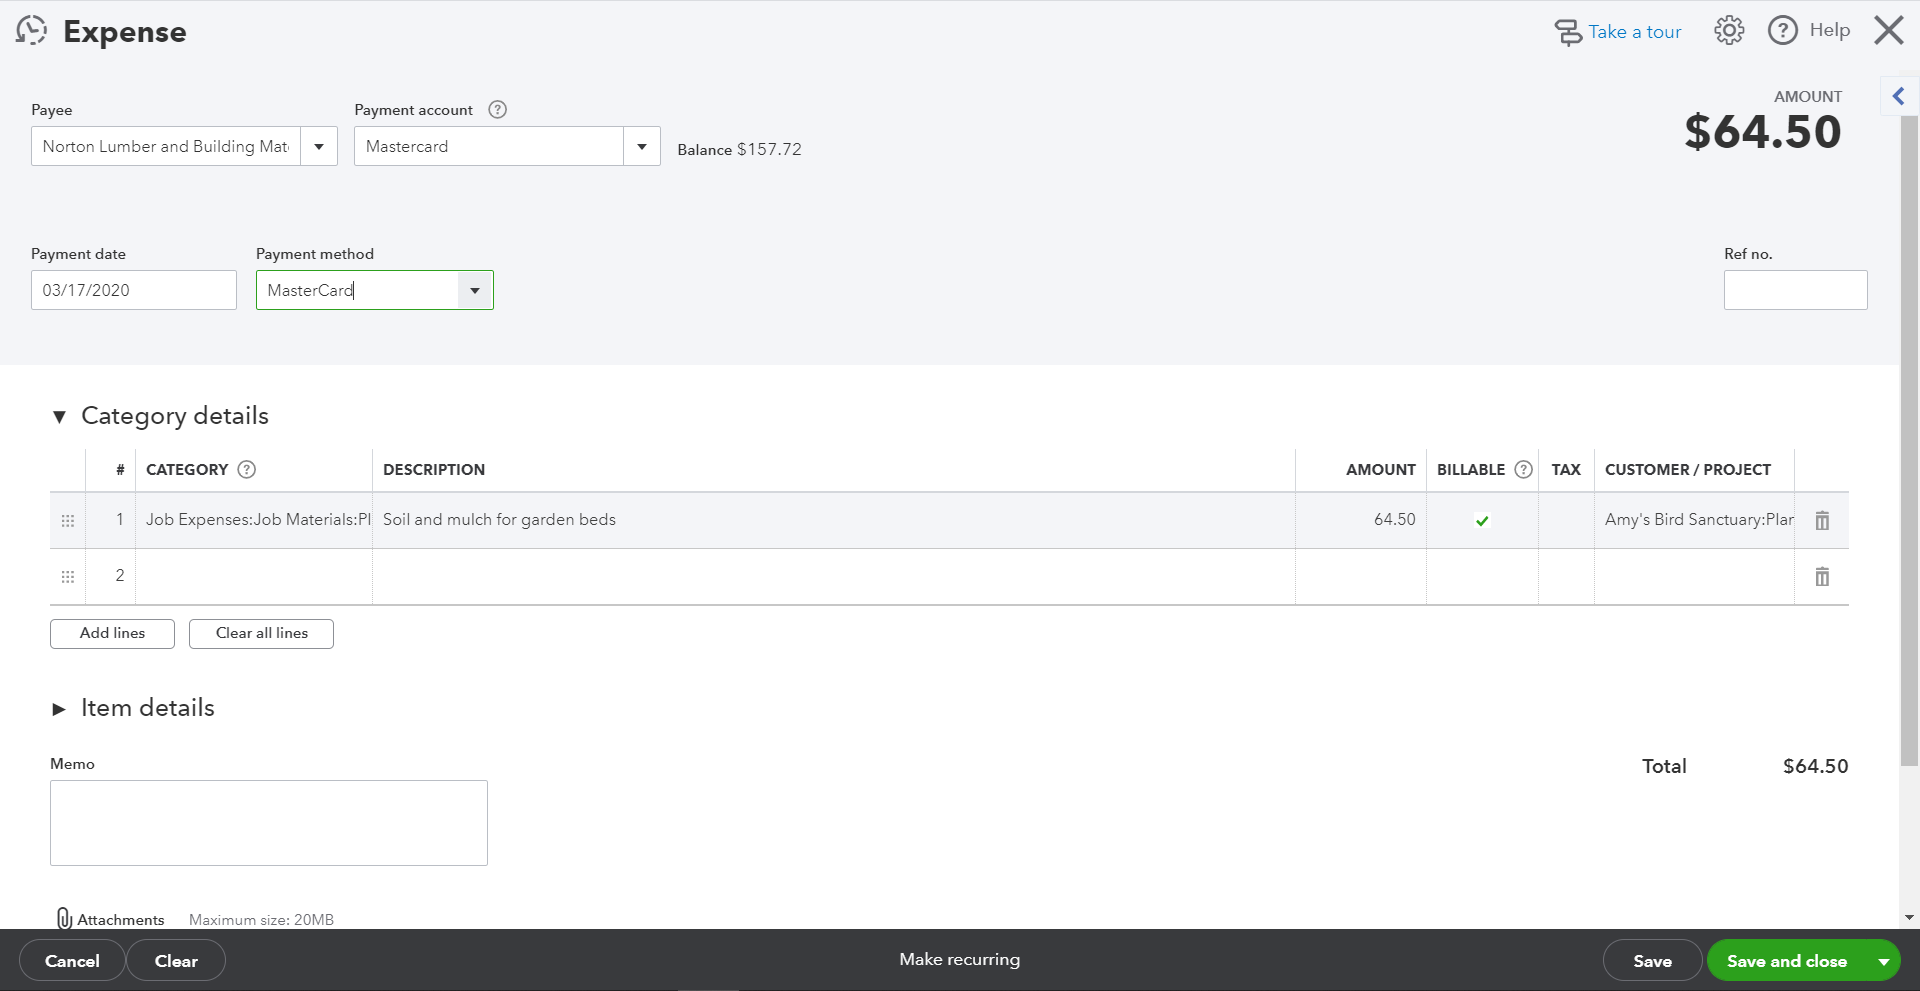
Next, you can start recording transactions for the project, right in the Project detail page by clicking on the New Transaction dropdown in the top right. Select the type of transaction you want to record and fill out the information on the transaction screen.
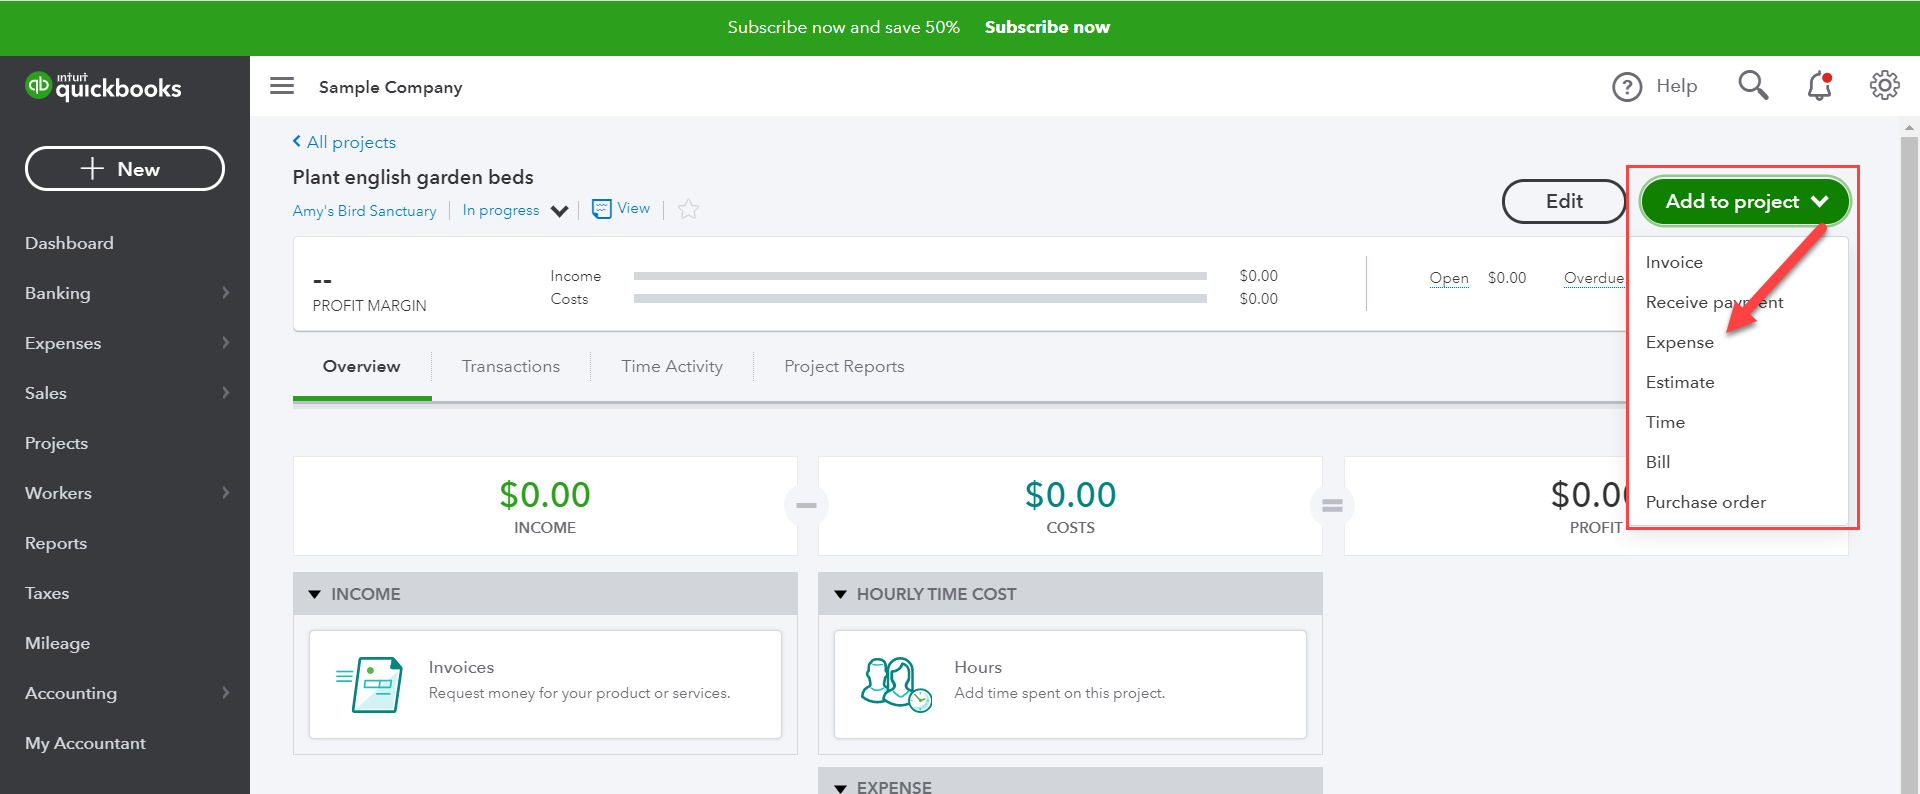
Then, select the Project name from the drop down under the Customer/Project column.
Step 3: Set up labor costing
Track time against your Projects, whether it’s billable or not, to capture labor costs. Just have employees assign project names to each time entry and select whether time is billable.
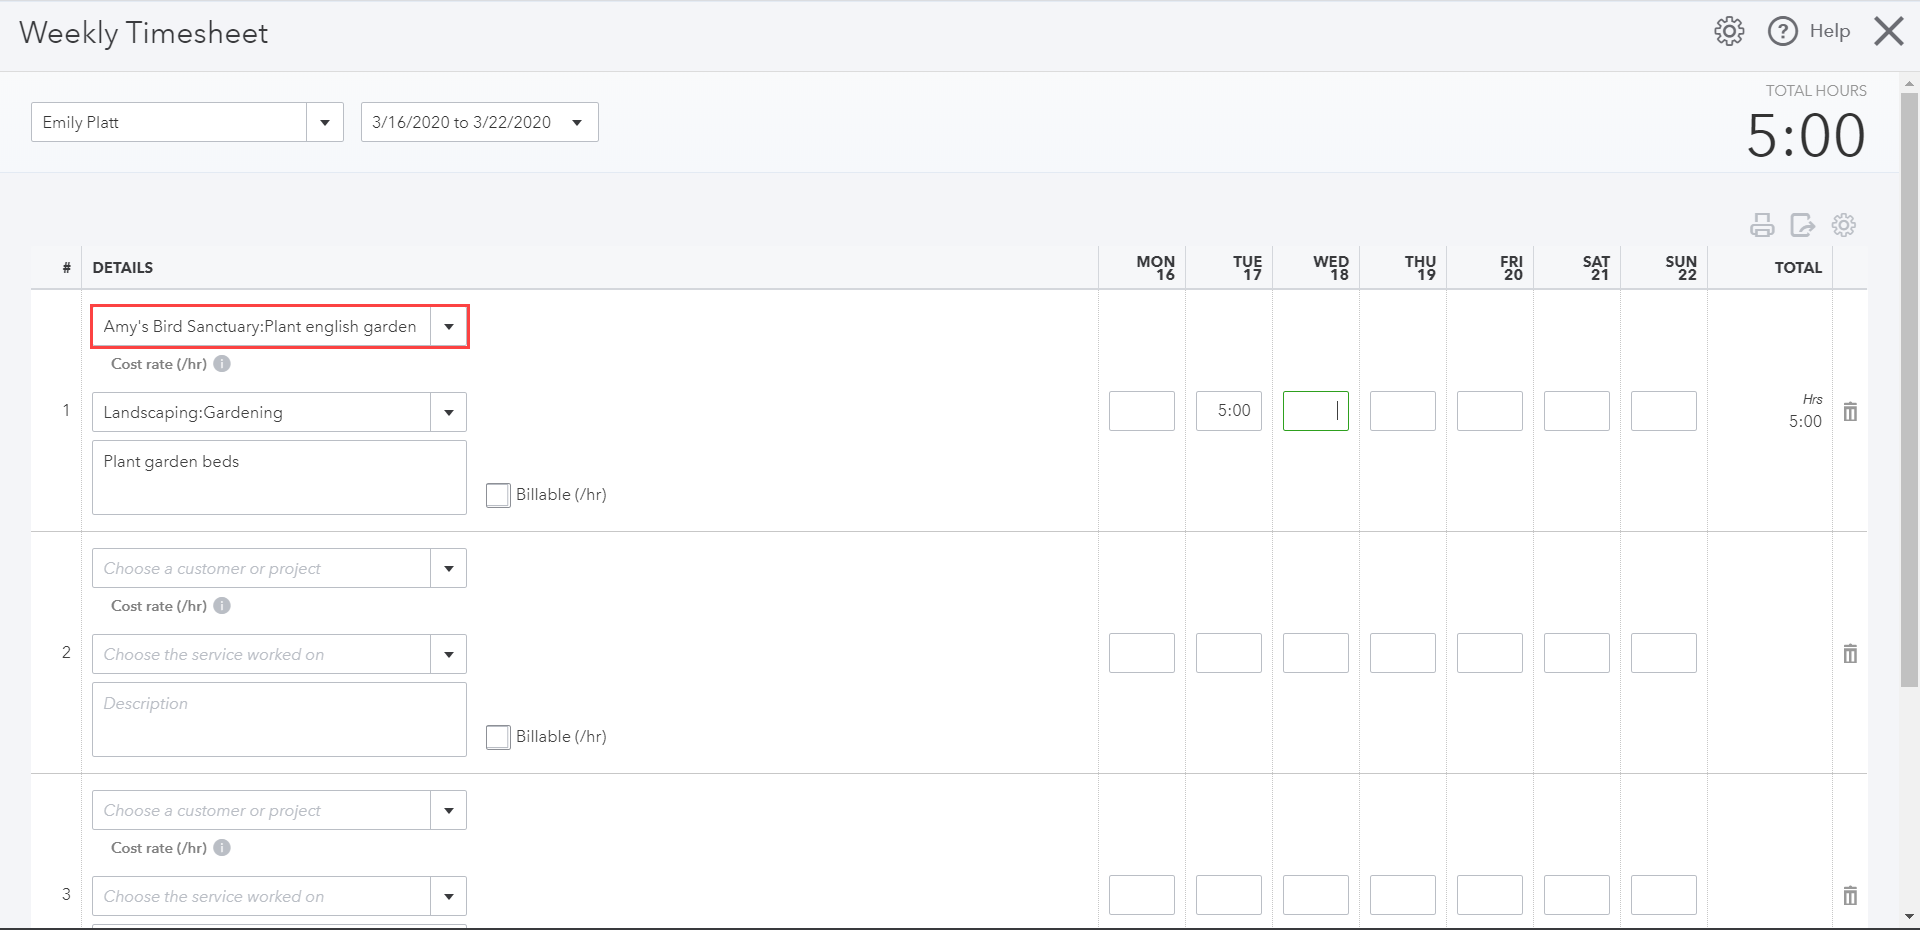
Labor costing is calculated by Projects in two ways, depending on whether you have QuickBooks Payroll enabled in your company.
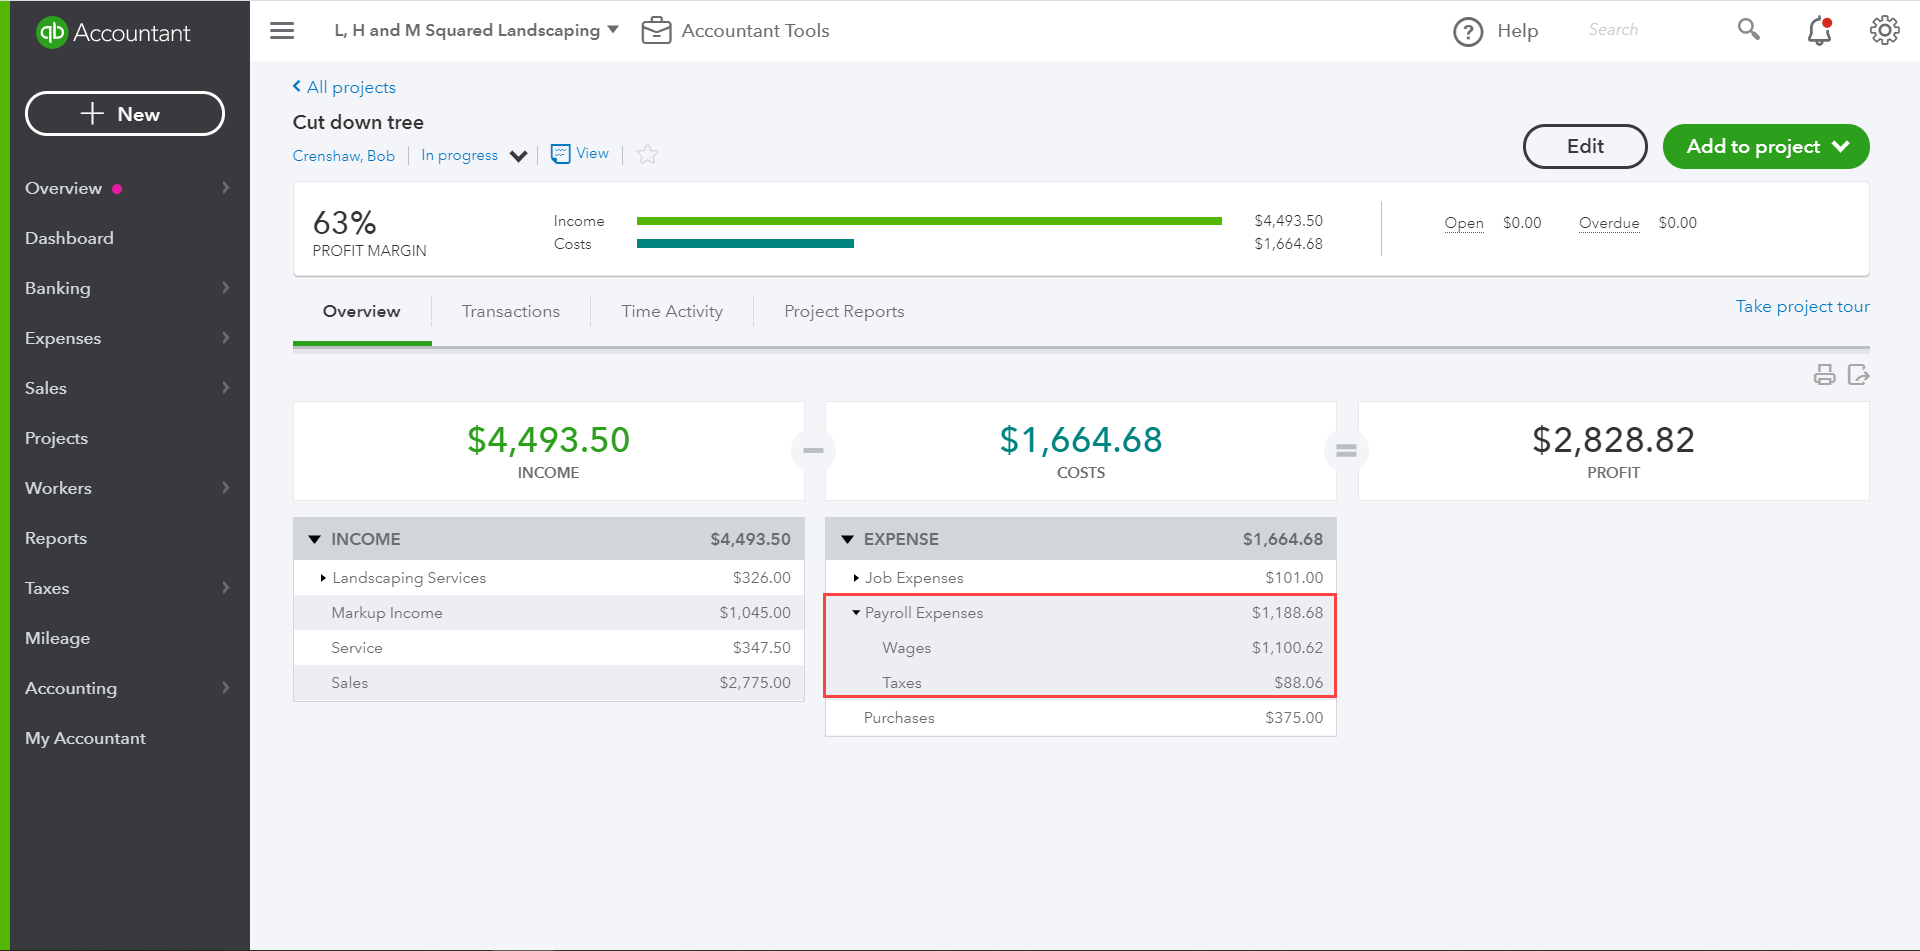
If QuickBooks Payroll is enabled: If your QuickBooks Online Payroll subscription is turned on, QuickBooks will automatically assign the weighted dollar amount of each check to projects based on the hours worked on each project, including wages and payroll taxes. There is no addition setup needed, just make sure your employees assign the project name to each time entry they record.
Payroll labor costs will be reflected on both the project detail page and the Project Profitability Report.
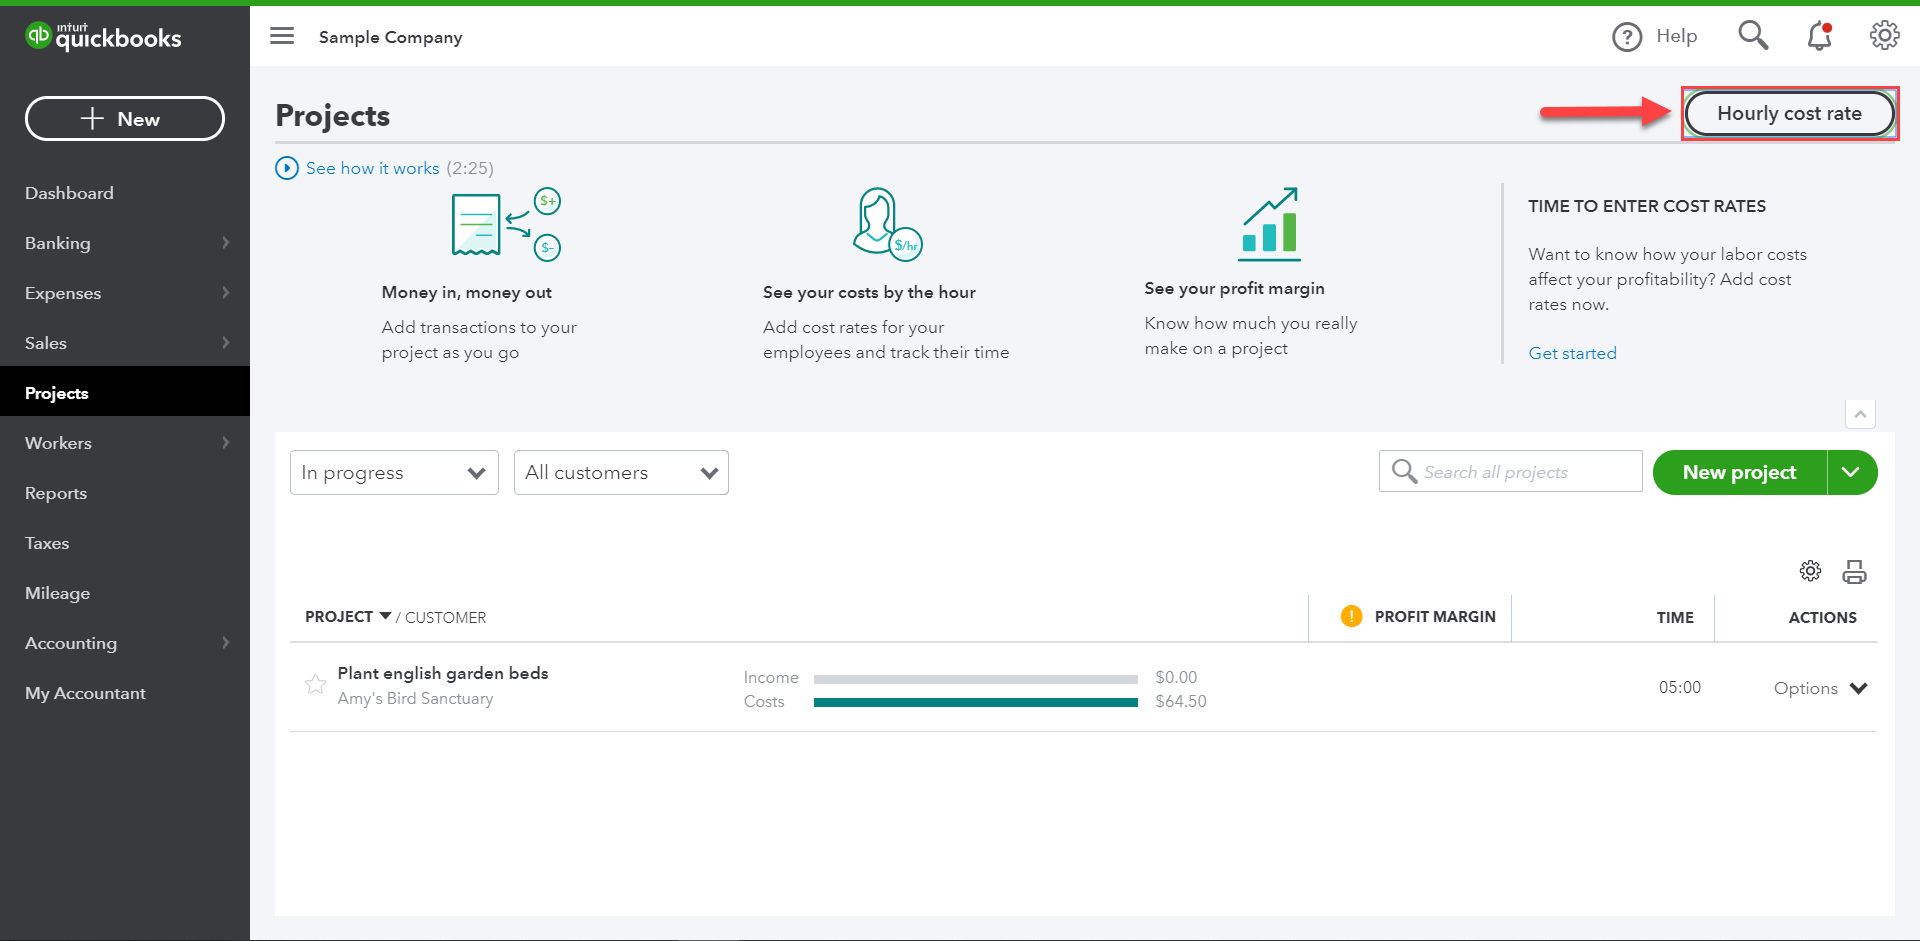
If QuickBooks Payroll is not enabled: In the Project Dashboard, click on Hourly cost rates in the top right corner. This will allow you to set up an hourly cost rate for each employee you want to track for project costing.
To create the rates, click “Add” next to each employee. This will open the COST RATE field and calculator. Enter a flat hourly rate or select the calculator icon to open the hour cost rate calculator. This calculator will sum to total of all cost lines entered. When you’re done, click Add. Once you’re done entering rates for all employees, click Save next to their name and then Done.
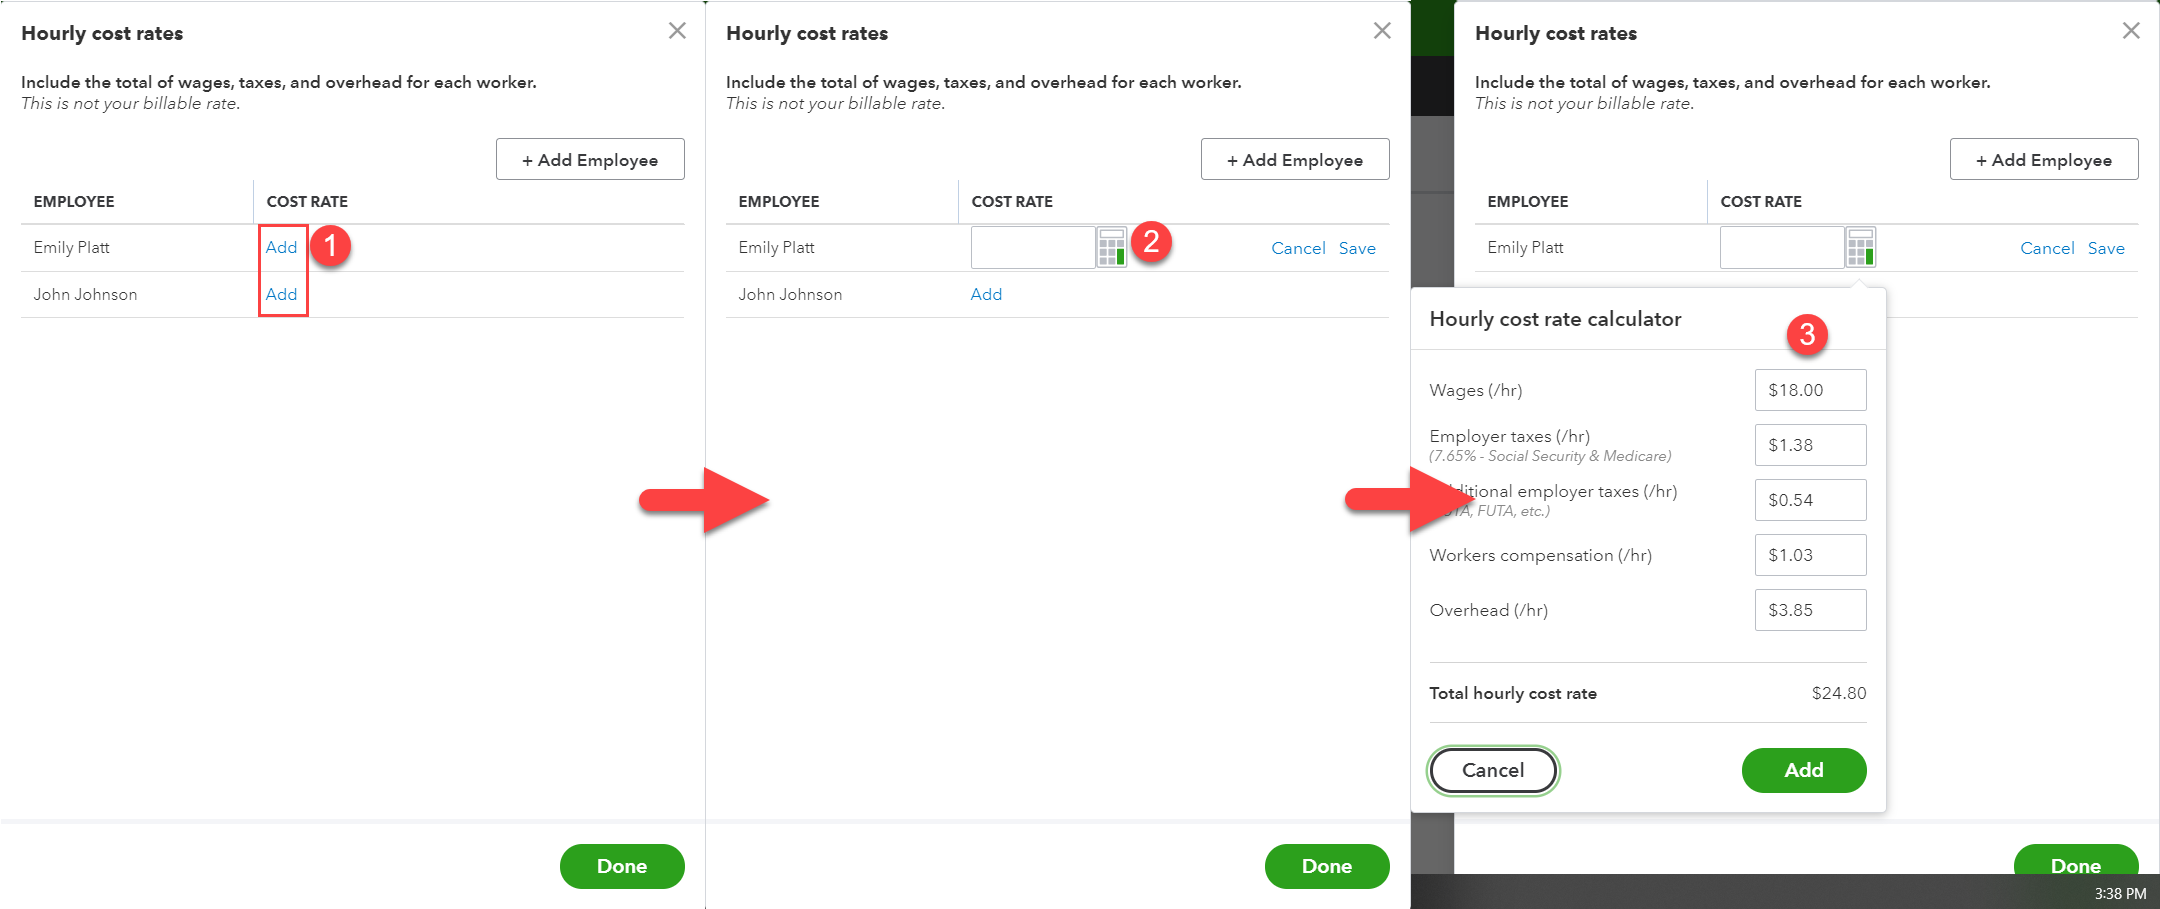
If the hourly cost rate is used, you’ll see labor costs calculated on the Project detail page, but it won’t appear on the Project Profitability Report since the hourly rate cost calculation isn’t recorded as a transaction on the books.
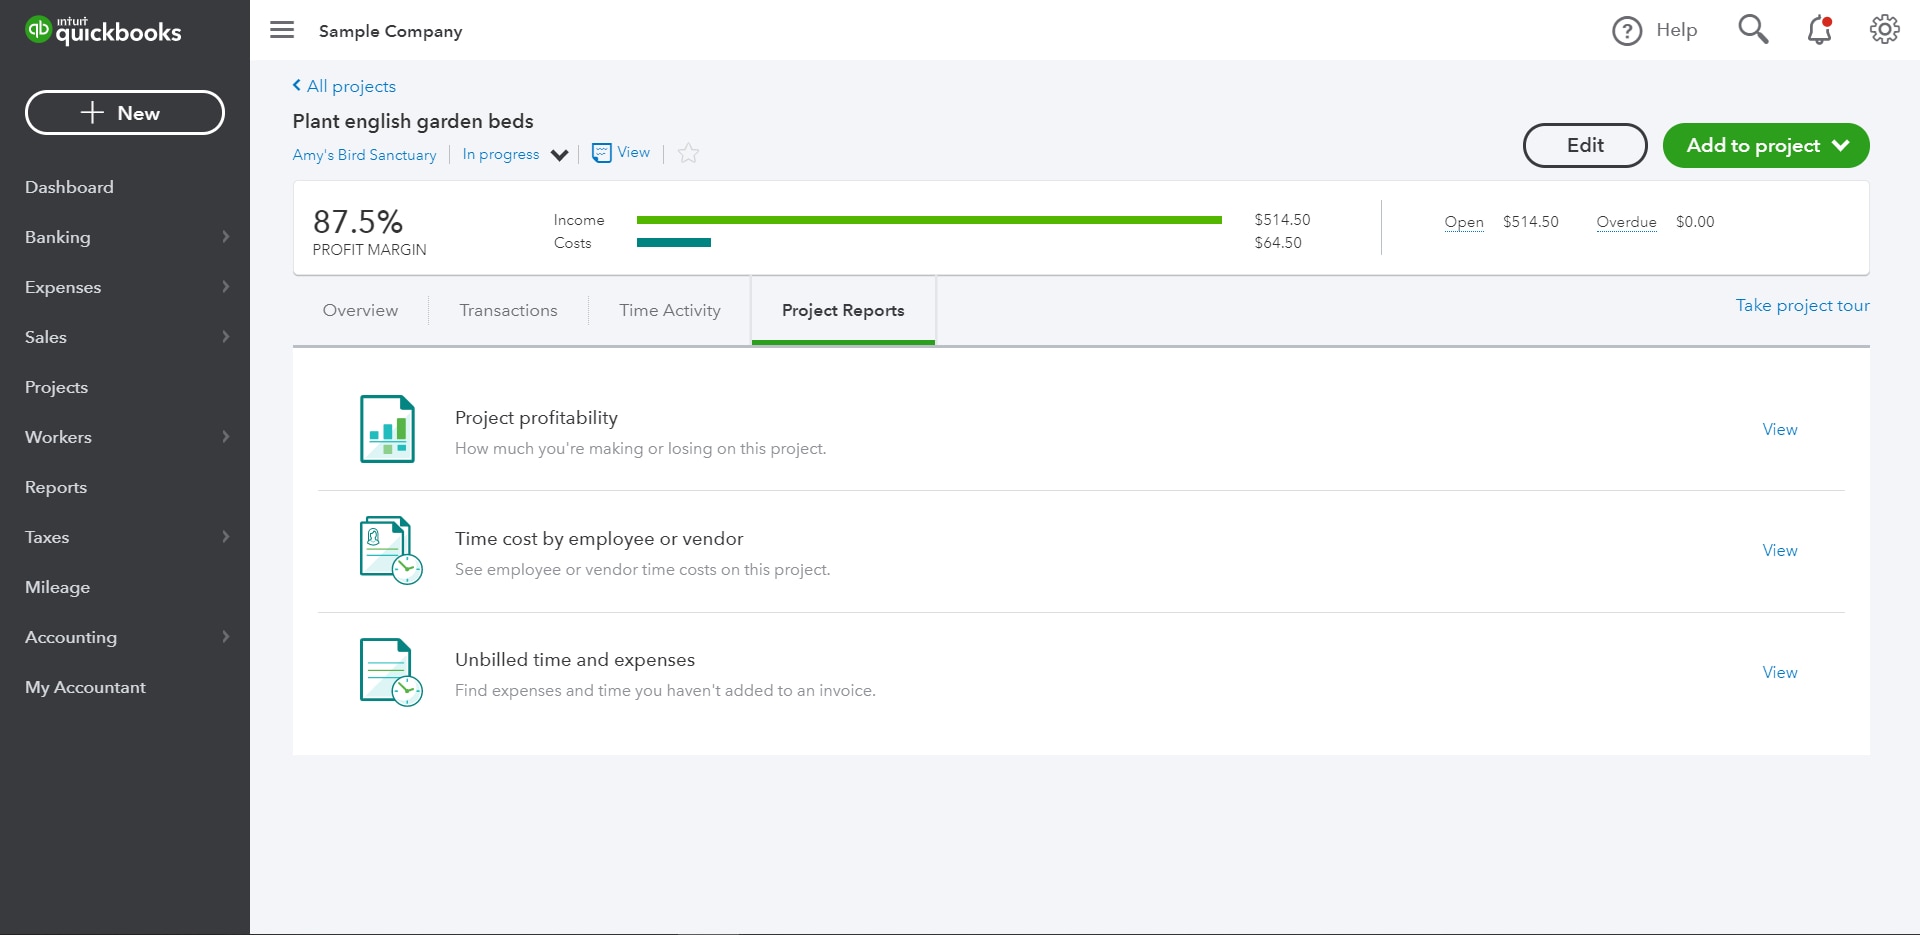
You can still keep tabs on the profitability of your projects by viewing the calculated labor costs by running the Time Cost by Employee or Vendor report.
Step 4: View your project information
Find all your project-related information in one place. Under the Project detail page, you’ll see four tabs including Overview, Transaction, Time Activity, and Project Reports.
- The Overview tab will show the profitability of the project, profit margin, and a breakdown of income and costs.
- Transactions shows all the transactions in QuickBooks that have been linked to the project, including income, expenses, time tracking, and payroll.
- View the time dedicated to each project in the Time Activity tab. You can even drill down by week to see the details behind each time entry.
- The Project Reports tab includes three reports: Project Profitability, Time Cost by Employee or Vendor, and Unbilled Time and Expenses.
Tips and Tricks
Accountant Users can turn on the Project feature for their clients, but they are not able to turn it off. Non-accountant Company Administrators are able to turn off Projects if needed.
Convert sub-customers to Projects and all existing transactions will automatically be brought over to the Project Center.
There is no limit to the number of time-tracking only users you can set up in QuickBooks. You can set up all your subcontractors and assign a cost rate in their Vendor detail page to view time details by vendor in the Project detail page.
Try out Projects to practice converting sub-customers to projects and more in the QuickBooks Online Sample Company.
Get the latest to your inbox
Get the latest product updates and certification news to help you grow your practice.
Thanks for subscribing.
Relevant resources to help start, run, and grow your business.