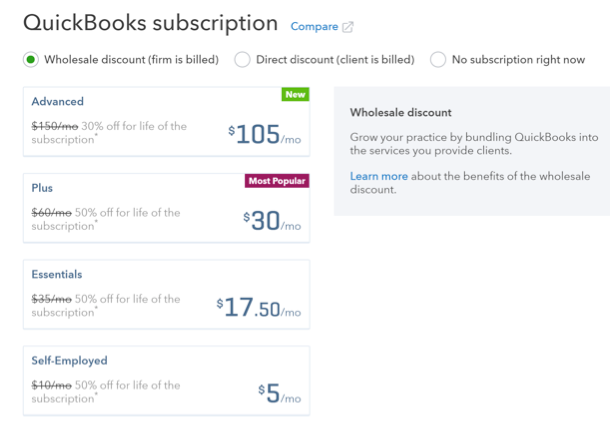
The new QuickBooks Online Advanced subscription should now be listed on your client dashboard in QuickBooks Online Accountant. Click the QuickBooks logo next to your client’s company name to open the file. There won’t be any data in this new subscription, but it is ready for our next steps. You will have 180 days to import desktop data to this new QuickBooks Online Advanced subscription before it locks.
First, make sure you are logged out of the QuickBooks Online Accountant file. This will help when you are prompted to log into QuickBooks Online Accountant again.
Next, verify if the client’s desktop file is compatible with the conversion tool. In QuickBooks Desktop, open the company and follow the steps below. These steps will verify the desktop database and prompt you to take additional action, if necessary. It will also rebuild the data as a cleanup step. Do not skip this process! You want to make sure well-structured data is moved over to QuickBooks Online Advanced.
NOTE: If the desktop software is more than two years old, you should download a free 30 day trial of the latest edition, install and open the company file in that latest desktop edition.
- Confirm QuickBooks Desktop file will convert:
- Open desktop file and run some utilities.
- File > Utilities > Verify Data.
- File > Utilities > Rebuild Data.
- Tap [F2].
- verify number of targets is below 350,000
- verify lists totals are below usage limits
- If necessary you can:
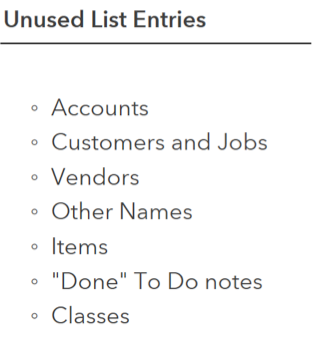
- Merge or make inactive any unnecessary list items.
- Condense data to remove targets and list items.
- Create a backup for a pre-conversion archive.
Conversion
You should already be in QuickBooks Desktop and have verified that the file is cleaned up and ready to move over to QuickBooks Online. QBO. You also have two complete backups filed away, one that you made before you started cleaning up the Desktop file and one that you made after the cleanup, but before conversion.
The conversion tool is located in the Company Menu in QuickBooks Pro and Premier.
If you are using QuickBooks Enterprise, the steps are a little different.
- Open the QuickBooks Enterprise company file.
- On your keyboard, press Ctrl+1 to open the “Product Information” window.
- Press Ctrl+B+Q.
- Select OK to close the Product Information.
- Follow the prompts to connect to QuickBooks Online.
Note: If the sign-in window doesn’t appear after closing “Product Information”, repeat steps 1-4.
If your client is using Mac, click this link to review additional resources on converting from Mac.
- Open QuickBooks Desktop
- Company > Export Company File to QuickBooks Online
- Click Continue to start the interview
- Enter your QBOA login info and agree to the Terms of Service by clicking Sign In.
- Review your moving-day checklist and access linked resources. Click Continue.
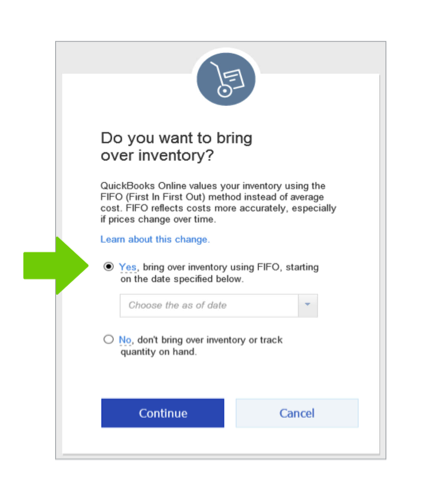
- Designate if you want the Inventory feature enabled in QuickBooks Online Advanced and desktop inventory converted to FIFO. Click Continue.
- Choose your client’s QuickBooks Online Advanced subscription from your firm’s client list then Continue.
- Type AGREE to allow acknowledge this step will be overwriting any data currently entered in that subscription. Click Replace.
- Intuit® will email you when conversion is finished.
The conversion is now complete. As you can now see, most of the harder work was done prior to the conversion phase. Intuit has made the actual conversion part easy. The key is to be sure you do your homework before you convert; this will make it all go smoother overall.
Post conversion
You will now receive an email from Intuit letting you know the data has been converted and you can access an Import Summary report to get more insights on the conversion. Save it for your records.
NOTE: If for any reason the file did not convert, Intuit will send you a notification. In my experience, they are really helpful at this stage so don’t worry. Just contact QBOA support for next steps.
Now, log back into QBOA and click the QuickBooks logo next to your client’s company name to open the QBO file that now contains the imported desktop data. You will need to have the QuickBooks desktop file open as well. Follow these steps below.
- Compare Reports: For each of the following, open in QuickBooks Online and QuickBooks Desktop and check for differences. NOTE: The first three reports in the list below will not match if you are importing inventory – this is due to recalculations from average cost inventory to FIFO.
- Run Balance Sheet, all dates, accrual basis.
- Run Profit & Loss, all dates, accrual basis.
- Inventory valuation summary, all dates (if applicable).
- Open Invoices.
- Unpaid Bills.
- Undeposited Funds transaction detail report.
- Sales Tax Liability.
- Payroll Tax Liability.
- Last Reconciliation report.
- Open in QuickBooks Desktop
- Use to create initial reconciliation in QBO
- Sales Tax Payments
- Taxes > Sales Tax > Record Tax Payment.
- Pre reconciliation, reissue and replace converted sales tax payments.
- Payroll setup
- Employees on left navigation bar.
- Verify “Paid In.” All employees paid in current year are marked YES.
- Click Complete payroll setup.
- Continue through prompts to complete setup.
- Check inventory conversion (if applicable)
- Converted to FIFO.
- Conversion tool will send error notifications (if any). NOTE: Complete and file IRS 3115 if client’s costing method will change (ie: average cost to FIFO)
- Set up Users and permissions
- Gear > Your Company > Manage Users.
- Company Information
- Gear > Your Company > Account and Settings > Company.
- Reconcile accounts
- Gear > Tools > Reconcile
- Perform initial reconciliation in QuickBooks Online based on final reconciliation in QuickBooks Desktop
- Add attachments
- Customer list.
- Vendor list.
- Individual transactions.
- Attachment center located in Gear > Lists > Attachment.
- Lists
- Make unwanted list items Inactive.
- Merge duplicate list items.
- Customize Sales Templates
- Gear > Your Company > Account and Settings > Sales.
- Recreate Memorized Reports
- Reports > My Custom Reports.
- Connect Apps
- QBOA > Apps > Find Apps. NOTE: Check with developer(s) to ensure new connection will not duplicate activity.
- Connect QB Payments
- Gear > Your Company > Account and Settings > Payments.
- Connect Bank Feeds
- Banking > Add Account. NOTE: To avoid duplication, choose appropriate date range for initial download.
- Set Closing Date
- Gear > Your Company > Account and Settings > Advanced.
Congratulations! You have successfully moved your client to QuickBooks Online Advanced. You can now collaborate and work with your client in real time. No more boxes of receipts, exchanging Accountant’s Copies or needing thumb drives. There are so many benefits to transitioning your clients to the cloud. Enjoy the new freedom that cloud accounting gives you and your clients!

